Hello everyone! (`・ω・´)ゞ Today, I'll show you the easiest way to set up a Django development environment using Docker. Many technical blog posts about Dockerizing Django that you find online aren't specifically tailored for development and often include configurations that are overkill for a development setup.
For instance, during the development phase, containerizing only Django and the database is sufficient; a local web server works perfectly fine. This minimal configuration allows for a quick setup so you can focus on writing code.
This article summarizes a simple development environment setup with Docker.
We'll be creating just three things: a Dockerfile, a docker-compose.yaml file, and a very simple Django application. Let's begin!
Note: I'm using PyCharm, but the basic setup is almost the same regardless of which IDE you're using (VS Code, etc.).
1. Create a Django project
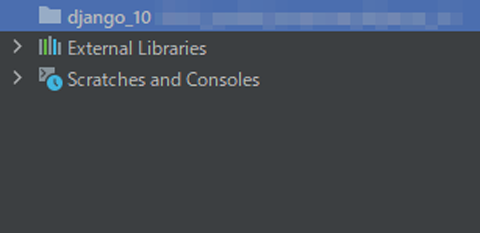
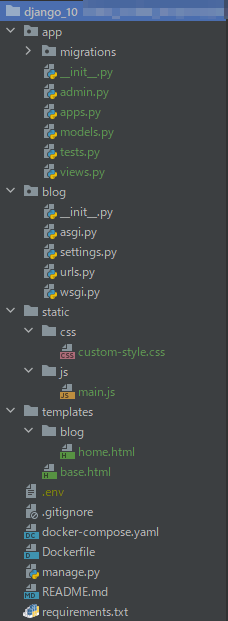
First, create a new folder. I've named mine django_10, but you can choose any name you like. This folder should be empty at this point. The attached image shows an example in PyCharm. You might not see External Libraries and Scratches and Consoles if you're using a different IDE like VS Code. These are irrelevant to our project, so you can safely ignore them.
Next, create a new Django project inside the empty folder you just created. Assuming you already have Django installed locally via pip (Python's package installer), run the following command:
django-admin startproject blog .
The word blog after startproject is entirely arbitrary.
You can use any name you prefer; this will become your project's name.
The crucial part here is the dot (.) after the project name. Without it, the project folder structure won't be created correctly.
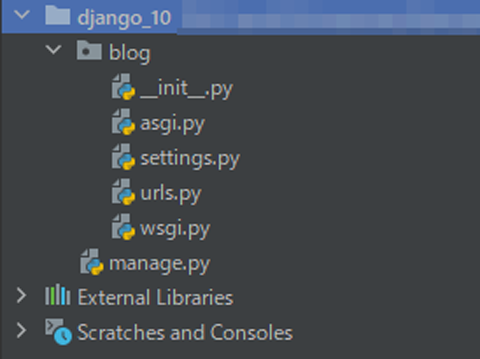
If the previous command was successful, you should see the following file structure:
2. Create Dockerfile and docker-compose.yaml files
The next step is to create a Dockerfile and a docker-compose.yaml file.
Below are the contents of these files.
Dockerfile
FROM python:3.9
ENV PYTHONUNBUFFERED 1
WORKDIR /blog #1
COPY requirements.txt /blog/requirements.txt

RUN pip install -r requirements.txt

COPY . /blog

CMD python manage.py runserver 0.0.0.0:8000
Explaining every line here would be quite lengthy, so I'll highlight the key aspects relevant to Django project setup:
- The database service name within the
docker-compose.yamlfile is crucial. This name will be used as the database hostname in yoursettings.pyfile. Within Docker Compose, services communicate with each other using their service names on the same network. Therefore, theHOSTvalue in yourDATABASESsetting insettings.pyshould bedb. - For the ports configuration under the db service, use different port numbers on the left and right sides. The right side can remain the PostgreSQL default
port: 5432. The left side should be a different port. This is because if PostgreSQL is already running on your host machine, port5432will be in use. Using a different port (e.g.,55432) avoids conflicts. Even if PostgreSQL isn't actively running on your host, another process might be using that port without your knowledge. Therefore, using different ports is a safer practice. - Add
env_fileto both backend and db services. Loading the.envfile within the Docker environment simplifies environment variable management. We'll discuss the.envfile later, but it will be placed in the project's root directory. healthcheckensures that a service is running correctly. Combined withdepends_on, it prevents the backend service from starting until the db service is healthy. Withouthealthcheck, timing differences in container startup could lead to errors.container_nameis unnecessary in this Docker configuration. Omitting it allows Docker Compose to automatically generate unique container names, preventing conflicts. This is especially helpful when running multiple projects or multiple instances simultaneously.
docker-compose.yaml
version: "3.9"
services:
  backend:
    container_name: blog
    build: .
    volumes:
      - .:/blog
    ports:
      - 8000:8000
    depends_on:
      - db_blog

  db_blog: #3
    container_name: db_blog
    image: postgres #2
    restart: always
    volumes:
      - .dbdata:/var/lib/db_blog
    ports:
      - 5451:5432 #4

    environment: #5
      - POSTGRES_DB=${POSTGRES_DB}
      - POSTGRES_USER=${POSTGRES_USER}
      - POSTGRES_PASSWORD=${POSTGRES_PASSWORD}
3. Create a requirements.txt file
Next, create a requirements.txt file.
Because we're using PostgreSQL, we need to include the database adapter. We'll also add django-environ to manage environment variables effectively.
requirements.txt
django
psycopg2-binary
django-environ
4. Place environment variables in the settings.py file
Now, let's modify settings.py as accompanying code.
The changes include the top part of the page and the DATABASES section.
The five lines at the top of the file, starting with env=, are the main changes here. These lines load the .env file and store values like SECRET_KEY and DEBUG_VALUE as environment variables.
As mentioned earlier, make sure to place the .env file in your project's root folder.
DEBUG setting
For DEBUG setting, the configuration is as follows.
DEBUG = os.getenv('DEBUG_VALUE') == 'TRUE'
The above expression means that if the value of DEBUG_VALUE in the .env file is TRUE, then DEBUG_VALUE and the right-hand side of the equivalence operator will match, resulting in the whole expression evaluating to TRUE.
Conversely, if DEBUG_VALUE is FALSE, then the entire expression will evaluate to FALSE because it does not match the right-hand side of the equivalence operator.
DATABASE setting
The database configuration has been significantly altered from the default SQLite setup.
All database settings are now retrieved from environment variables. Pay close attention to the HOST field in particular.
As mentioned previously, the HOST value must match the database service name specified in your docker-compose.yaml file.
Therefore, you need to set DB_HOST to db in your .env file. I wasted a lot of time stumbling over this issue when I first started developing applications with Docker, so I want to highlight it to save you the same trouble.
settings.py
from pathlib import Path
import environ
import os

# ↓↓↓↓↓ The part in between has changed. ↓↓↓↓↓
env = environ.Env()
BASE_DIR = Path(__file__).resolve().parent.parent
environ.Env.read_env(os.path.join(BASE_DIR, '.env'))

SECRET_KEY = os.getenv('SECRET_KEY')

DEBUG = os.getenv('DEBUG_VALUE') == 'TRUE'
# ↑↑↑↑↑ The part in between has changed. ↑↑↑↑↑

ALLOWED_HOSTS = []

# Application definition

INSTALLED_APPS = [
    'django.contrib.admin',
    'django.contrib.auth',
    'django.contrib.contenttypes',
    'django.contrib.sessions',
    'django.contrib.messages',
    'django.contrib.staticfiles',
]

MIDDLEWARE = [
    'django.middleware.security.SecurityMiddleware',
    'django.contrib.sessions.middleware.SessionMiddleware',
    'django.middleware.common.CommonMiddleware',
    'django.middleware.csrf.CsrfViewMiddleware',
    'django.contrib.auth.middleware.AuthenticationMiddleware',
    'django.contrib.messages.middleware.MessageMiddleware',
    'django.middleware.clickjacking.XFrameOptionsMiddleware',
]

ROOT_URLCONF = 'blog.urls'

TEMPLATES = [
    {
        'BACKEND': 'django.template.backends.django.DjangoTemplates',
        'DIRS': [BASE_DIR / 'templates'],
        'APP_DIRS': True,
        'OPTIONS': {
            'context_processors': [
                'django.template.context_processors.debug',
                'django.template.context_processors.request',
                'django.contrib.auth.context_processors.auth',
                'django.contrib.messages.context_processors.messages',
            ],
        },
    },
]

WSGI_APPLICATION = 'blog.wsgi.application'

# Database

# ↓↓↓↓↓ The part in between has changed. ↓↓↓↓↓
DATABASES = {
    'default': {
        'ENGINE': 'django.db.backends.postgresql_psycopg2',
        'NAME': os.getenv('DB_NAME'),
        'USER': os.getenv('DB_USER'),
        'PASSWORD': os.getenv('DB_PASSWORD'),
        'HOST': os.getenv('DB_HOST'),
        'PORT': os.getenv('DB_PORT')
    }
}
# ↑↑↑↑↑ The part in between has changed. ↑↑↑↑↑

# Password validation

AUTH_PASSWORD_VALIDATORS = [
    {
        'NAME': 'django.contrib.auth.password_validation.UserAttributeSimilarityValidator',
    },
    {
        'NAME': 'django.contrib.auth.password_validation.MinimumLengthValidator',
    },
    {
        'NAME': 'django.contrib.auth.password_validation.CommonPasswordValidator',
    },
    {
        'NAME': 'django.contrib.auth.password_validation.NumericPasswordValidator',
    },
]

# Internationalization

LANGUAGE_CODE = 'en-us'

TIME_ZONE = 'UTC'

USE_I18N = True

USE_TZ = True

# Static files (CSS, JavaScript, Images)

STATIC_URL = '/static/'

DEFAULT_AUTO_FIELD = 'django.db.models.BigAutoField'
.env file
Here is the .env file that needs to be applied to the environment variable in settings.py:
As previously mentioned, DB_HOST is the database service name set in Docker. Additionally, the port has been set to DB_PORT=5432. In this example, 5432 is the port on the Docker container side, as configured in docker-compose.yaml. 55432 refers to the port on your local computer.
When specifying the PostgreSQL port in settings.py, make sure to use 5432, not 55432 . This means that you should specify the port on the Docker container side.
.env
DEBUG_VALUE=TRUE
SECRET_KEY=****************************************************************

DB_NAME=postgres
DB_USER=postgres
DB_PASSWORD=postgres
DB_HOST=db_blog
DB_PORT=5432

POSTGRES_DB=postgres
POSTGRES_USER=postgres
POSTGRES_PASSWORD=postgres
.gitignore file
At this point, let's create a .gitignore, taking into account that we will be using github for development.
You can find plenty of gitignore for using django by doing a search. The .gitignore I use is pushed here.
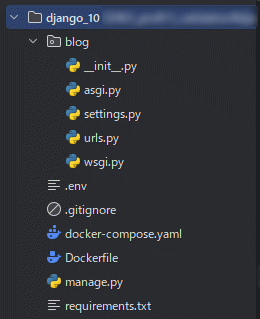
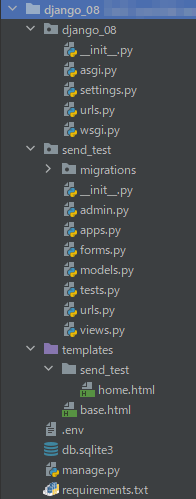
At this point, the file structure should look something like this.
5. Build the Dockerfile
Now that we have completed the preparation steps, it's time to build the Dockerfile. Enter the following command from the command line, starting from the root folder of your project.
$ docker-compose up --build
6. Confirm Building Django
We have finally reached this point. Let's type the command as accompanying box:
$ python manage.py runserver
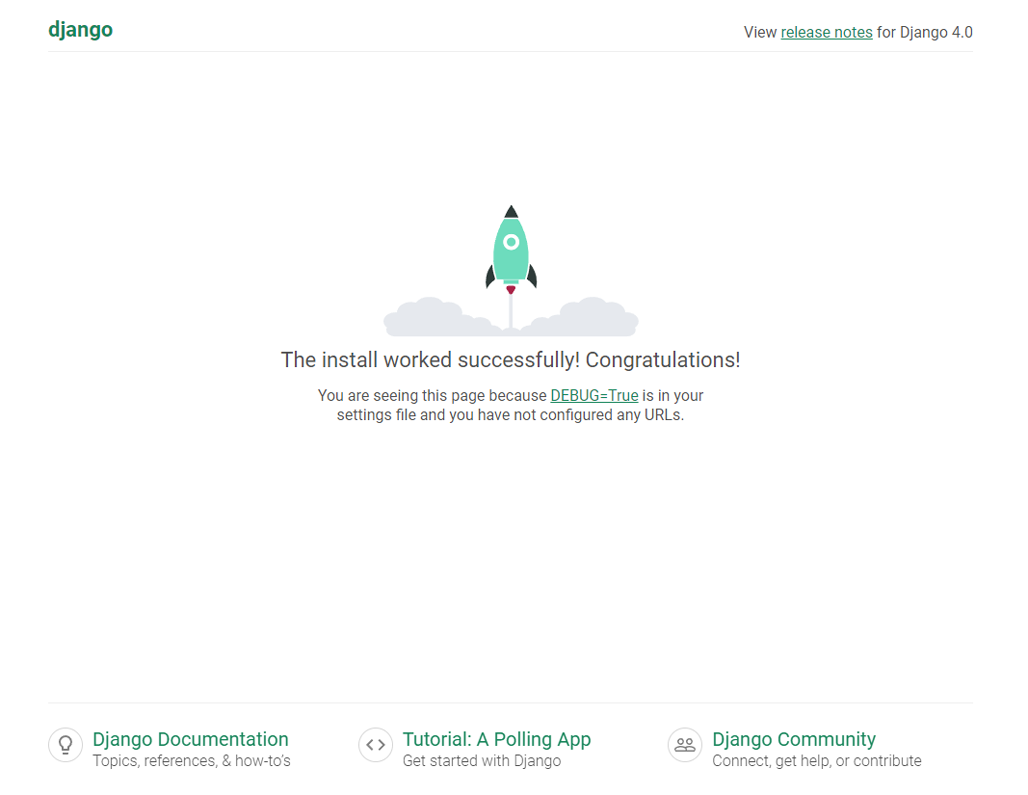
If you receive the message as accompanying box, you have succeeded.
System check identified no issues (0 silenced).
February 03, 2022 - 08:02:05
Django version 3.2.10, using settings 'blog.settings'
Starting development server at http://0.0.0.0:8000/
Quit the server with CONTROL-C.
However, if you enter the following URL: http://0.0.0.0:8000/, the Django screen will not appear. Please change it to http://127.0.0.1:8000/ or http://localhost:8000/.
After doing so, you should see a screen that looks like this:
7. Make the manage.py is available
Okay, so you've confirmed Django is working. Now, you'll need to use those handy manage.py commands to do things like migrations and create a superuser.
But here's the catch: if you're using Docker, running these commands directly from your local command line won't work.
You need to get inside the Docker container first. Here's how:
If you see a # on the command line, that means you have succeeded.
This step is also where it is easy to run into issues when building a Django environment using Docker.
Furthermore, this article will not cover database migration or createsuperuser, as these topics are already covered in other blogs that discuss Django.
docker-compose exec backend bash
8. Adding template, static folder, and STATICFILES_DIRS
We've now completed the minimum setup for our Django project. However, there's still more to do before we can add an application.
Let's create a very simple application that just displays "hello world" in a template.
Here are the steps we'll follow:
- 8-1. Create a new application in the project.
- 8-2. Create a template folder in the root directory and add a template such as `base.html`.
- 8-3. Create a static folder in the root directory to add CSS and js files.
Let's walk through the details of these steps.
8-1. Creating a New Application in the Project
To create a new application, follow these steps:
- Enter Docker using the commands introduced in section 7.
- Type the following command:
python manage.py startapp app
This will add an application named app. The file structure after executing the command will look like this:
8-2. Create a template folder in the root directory and add a base.html template and a home.html template
After creating the application, the next step is to add it to the Django project.
In settings.py, add this application as accompanying code.
For reference, if the app name were "blogging", this part would be as follows.
'blogging.apps.BloggingConfig'
INSTALLED_APPS = [
    'django.contrib.admin',
    'django.contrib.auth',
    'django.contrib.contenttypes',
    'django.contrib.sessions',
    'django.contrib.messages',
    'django.contrib.staticfiles',
    'app' #add
]
Once you have reached this point, create a templates folder. Inside the templates folder, create a base.html file and an app folder.
Inside the app folder, create a home.html file. Note that the name of the app folder depends on the name of the application created in the project.
Specifically, the structure inside the templates folder should look like this:
templates/
├── base.html
└── app/
    └── home.html
8-3. Create a static folder in the root directory and add CSS and JavaScript files.
Next, create a static folder in the project's root directory. Inside the static folder, create a css folder and a js folder. Inside these folders, create empty custom-style.css and custom.js files.
To reflect the code written in CSS or JS in the template, you need to add STATICFILES_DIRS to settings.py. Add the following code under STATIC_URL = '/static/' in settings.py:
STATICFILES_DIRS = [
    os.path.join(BASE_DIR, "static"),
]
We now have all the files you need to run Django. It should look something like this.
9. Add minimal code to urls.py and views.py to display hello world.
Next, let's create urls.py and views.py.
As previously mentioned, we will now write the minimum amount of code to display "hello world" in the browser.
First, add the following code to urls.py located in the project folder.
urls.py(project folder)
from django.contrib import admin
from django.urls import path, include

urlpatterns = [
    path('admin/', admin.site.urls),
    path('', include('app.urls', namespace='app')),
]
Next, let's write the view. In this case, we will use TemplateView because we believe it provides a more straightforward, minimal setup.
views.py
from django.views.generic import TemplateView

class HomeView(TemplateView):
    template_name = "app/home.html"
Next, create a urls.py file in the app folder and include the accompanying code:
app/urls.py
from django.urls import path
from app import views

app_name = "app"

urlpatterns = [
    path('', views.HomeView.as_view(), name="home"),
]
Now we're ready to add code to our templates. Following Django best practices, we'll keep base.html relatively minimal,
primarily containing the {% block content %}{% endblock %} template tag.
The actual content will go in home.html.
We also need to include the CSS and JavaScript files we configured earlier within base.html. Create base.html and home.html as follows:
base.html
{% load static %}
<!doctype html>
<html lang="en">
<head>
    <meta charset="UTF-8">
    <meta name="viewport"
          content="width=device-width, user-scalable=no, initial-scale=1.0, maximum-scale=1.0, minimum-scale=1.0">
    <meta http-equiv="X-UA-Compatible" content="ie=edge">
    <link rel="stylesheet" href="{% static 'css/custom-style-base.css' %}">
    <title>Document</title>
</head>
<body>
    {% block content %}
    {% endblock %}

    <script src="{% static 'js/custom.js' %}"></script>
</body>
</html>
home.html
{% extends 'base.html' %}

{% block content %}
    <h1>Hello world!</h1>
{% endblock %}
The message as accompanying image should now appear in your browser:
Congratulations! You have completed a basic Django setup. We can now use this setup as a base from which to experiment with different applications.

Avoid Using the Same Port
In the final section, I will discuss a common problem that arises when building a development environment with Docker. If the local port overlaps with the port used by another Docker container, the container will not start properly.
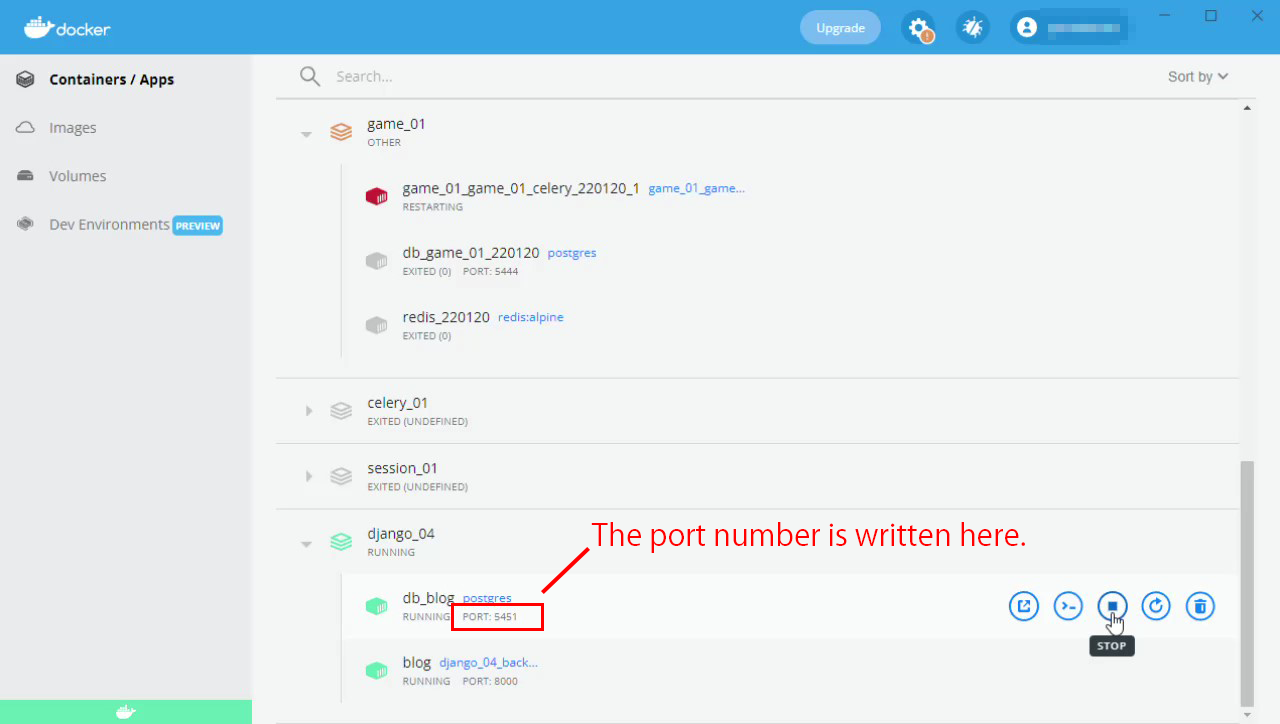
To avoid this issue, you need to set a non-overlapping port number or stop the container with the overlapping port. You can stop the container using the command line, but this method has been described in many other articles on the web. Since I am using Windows 11 as my local OS, I will show you how to stop it from the Docker desktop in Windows 11.
You can see the port number written in the app section of each container after launching Docker for Windows and selecting containers/Apps, as shown in the image below. If any container uses the same port as the one specified in the docker-compose.yaml file, stop it by selecting the stop button from the menu on the right.
That's all. This basic setup will be used as a premise in other articles on this blog. It is also helpful for quick environment creation in everyday app development. Please make use of it!
Lastly, the GitHub repository for this project can be found here.