Hi, in this article, I will introduce how to implement reCAPTCHA v3 in Django.
If you are wondering "what is reCAPTCHA?" please see this article.
reCAPTCHA is commonly used to prevent spam and unauthorized access in website and application forms, but it can also prevent unauthorized access from automated scripts or scraping tools.
Since reCAPTCHA became v3, it can determine whether the user is human or bot without selecting an image or checking a checkbox. This smarter form has further improved user experience compared to previous versions.
While reCAPTCHA protects websites from various threats in a smart way, there are some hurdles for beginners of web development to implement reCAPTCHA, such as how to obtain tokens and write views.
In this article, we will introduce how to implement reCAPTCHA V3 to protect forms in Django from two perspectives: function-based views and class-based views, for those who are implementing reCAPTCHA for the first time on their website.
Overview of Development Steps
Assuming you have already set up Django, the procedure for implementing reCAPTCHA is as follows:
- Obtain a
public keyand aprivate keyfrom the reCAPTCHA V3 administration page - Add the two keys to
settings.py - Add code to
views.py - Add code to
urls.py - Add code to
forms.py - Add code to the frontend (template)
- Add code to
views.pyfor token validation (this is important)
The following reCAPTCHA packages are available for Django.
- [django-recaptcha](https://github.com/torchbox/django-recaptcha)
- [Django reCaptcha v3](https://github.com/kbytesys/django-recaptcha3)
However, we don't need these packages. Although I tried to implement them, I found that it's easy enough to do without them.
For this reason, I'll show you how to do it without using them.
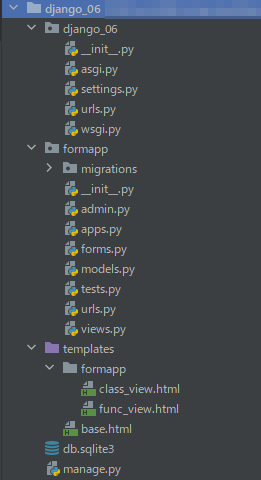
And below is an image that shows the structure of this project. It's a very basic project structure.
The project name is django_06, and the application name is formapp.
If you want to set it up using Docker and PostgreSQL, you can find instructions in this article [here](https://rx-36.life/post/basic-setup-for-running-django-with-docker/).
1. Obtain a public key and a private key from the reCAPTCHA V3 administration page
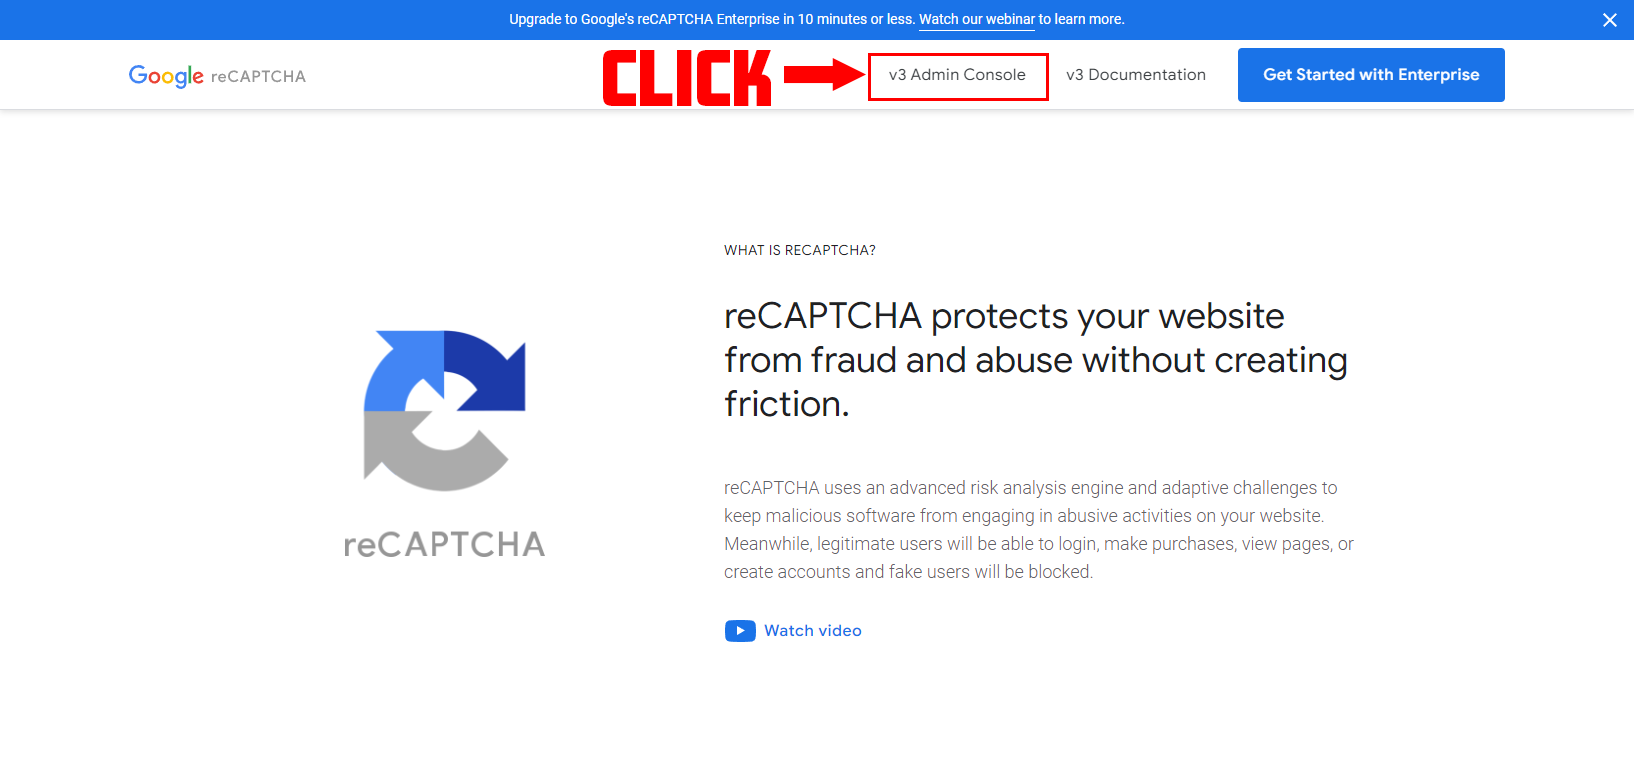
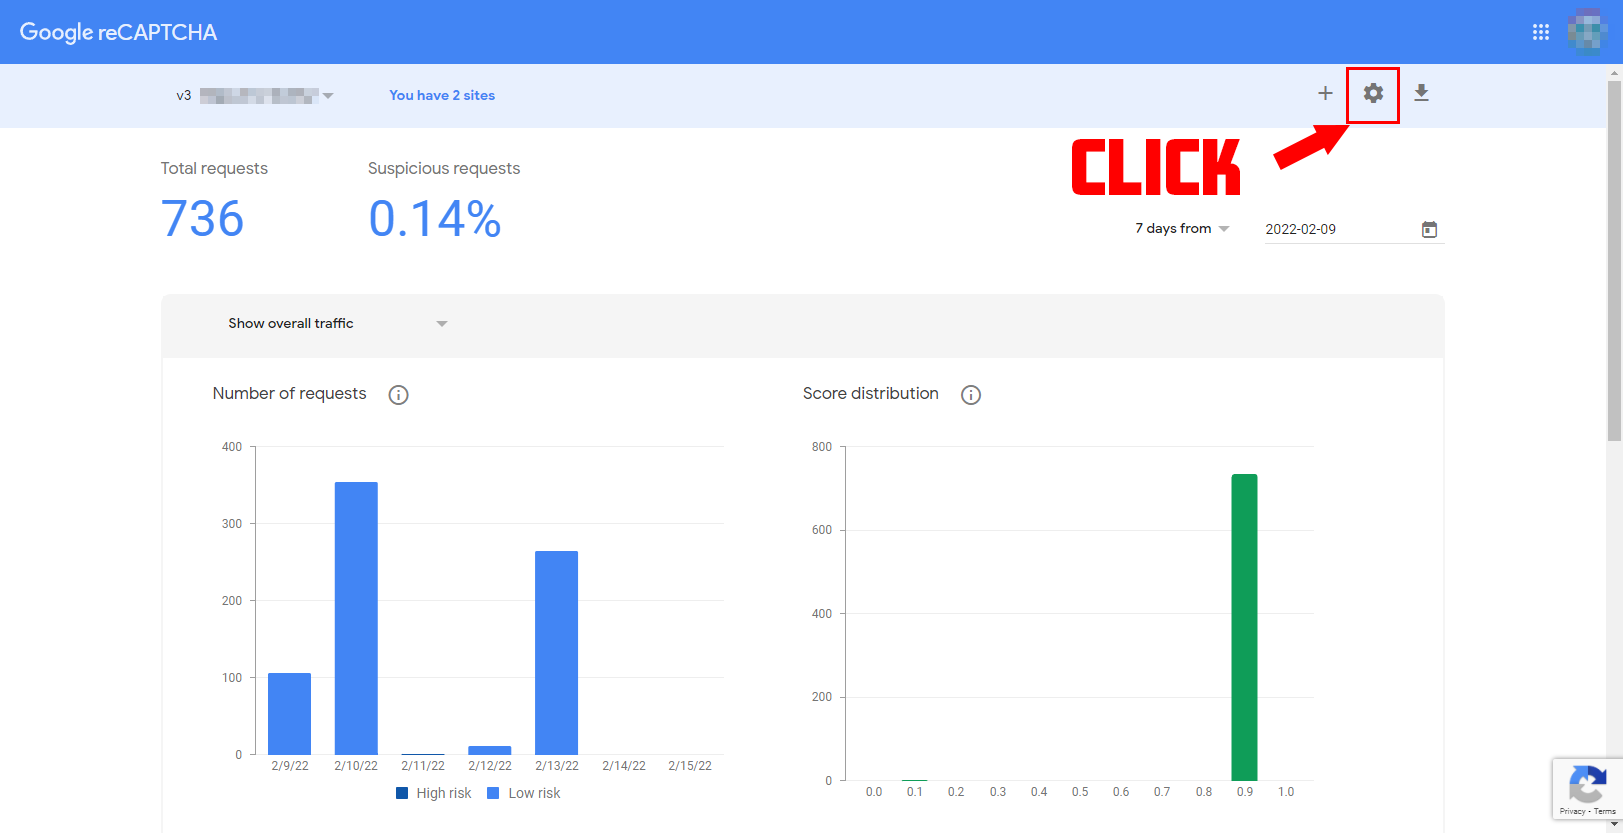
First, access the reCAPTCHA page and proceed to the settings page.
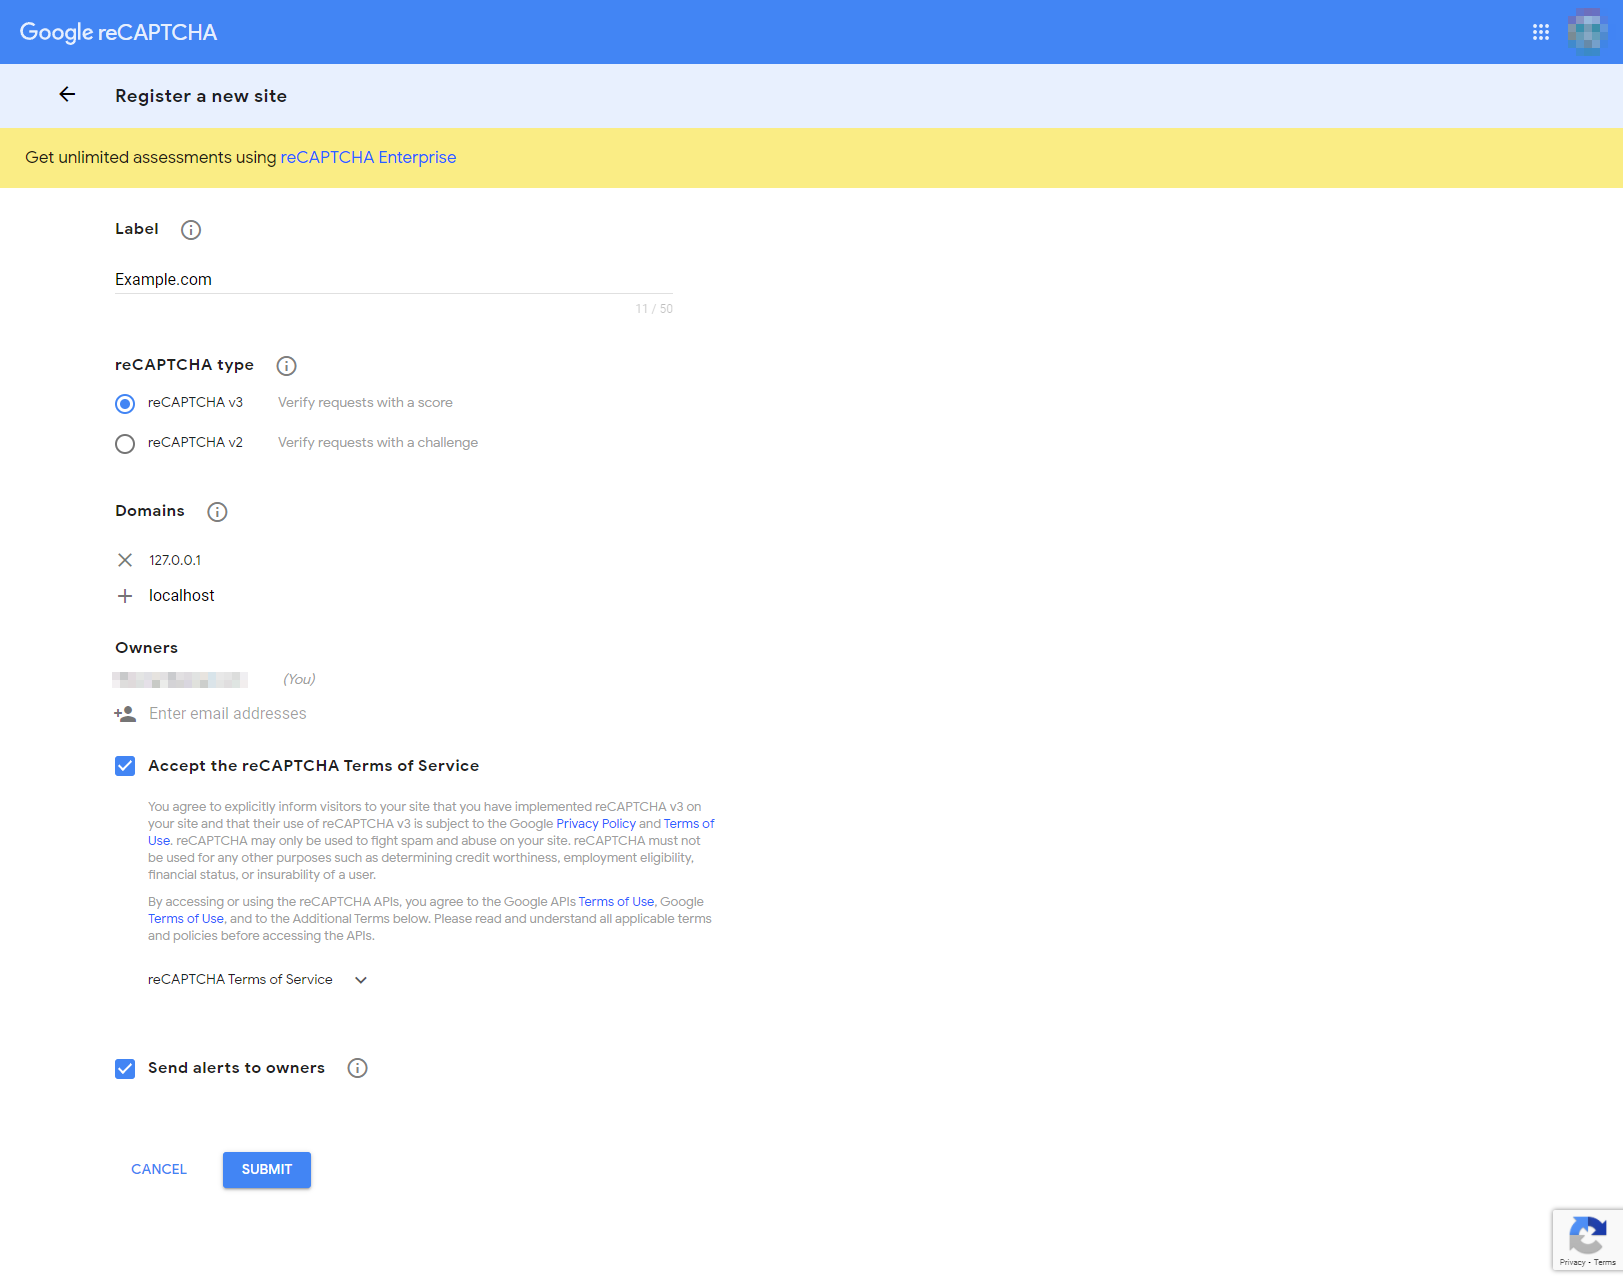
Once the settings screen is displayed, please proceed with the settings as follows:
reCAPTCHA Type
Choose reCAPTCHA V3.
Domains
Include the URLs 127.0.0.1 and localhost for the development environment.
Owners
Enter the email address to be used for this development.
With regards to the admin settings for reCAPTCHA, you can see from the admin screen that there are only a few setting items, making it easy to configure.
2. Write the Two Keys in settings.py
After setting up the reCAPTCHA administration page, let's configure Django's settings.py.
That's all for the settings for reCAPTCHA in settings.py.
RECAPTCHA_PUBLIC_KEY = 'xxxxxxxxxxxxxxxxxxxxxxxxxxxxxxxxxxxxxxxxxx'
RECAPTCHA_PRIVATE_KEY = 'xxxxxxxxxxxxxxxxxxxxxxxxxxxxxxxxxxxxxxxxxx'
3. Add basic code to views.py
Let's set up a basic views.py file to introduce two types of views: function-based views and class-based views.
Other blogs that cover Django + reCAPTCHA often only introduce one of these cases. However, I believe it's useful to compare and contrast function-based and class-based views. Therefore, I'll show you both cases in this article.
3-1. function-based views views.py
from django.shortcuts import render
from django_06 import settings

def home(request):
    return render(request, "formapp/func_view.html", {'form':form, 'recaptcha_site_key':settings.RECAPTCHA_PUBLIC_KEY})
The class-based view has code related to forms. Although this view is created before the form is created, an error occurs when the code is executed. However, for now, ignore this error.
Furthermore, the task of writing code in views.py is not complete.
We also need to validate the data obtained by reCAPTCHA in the frontend, which requires additional code. Therefore, I will come back views.py later.
3-2. class-based viewsviews.py
from django.views.generic import FormView
from .forms import CreateForm

class ContactFormView(FormView):
    template_name = 'formapp/class_view.html'
    form_class = CreateForm
    success_url = '/contact2/'
    extra_context = {
        'recaptcha_site_key': settings.RECAPTCHA_PUBLIC_KEY
    }
4. Add code to urls.py
As I mentioned above, I created two views in this article, a function-based view and a class-based view, so I wrote url for each View.
Note that only the necessary code for implementing the function in urls.py on the application side will be provided. in this section.
The urls.py file at the project level is omitted.
formapp/urls.py when using function base view
from django.urls import path, include
from formapp import views

app_name = 'formapp'

urlpatterns = [
    path('contact1/', views.home, name='post_list'),
]
formapp/urls.py when using class base view
from django.urls import path, include
from formapp import views

app_name = 'formapp'

urlpatterns = [
    path('contact2/', views.ContactFormView.as_view(), name='post_list2'),
]
5. Add code to forms.py
Creating a form. I have created a simple form that utilizes reCAPTCHA validation.
forms.py
from django import forms

class CreateForm(forms.Form):
    name = forms.CharField(label="Name", max_length=200)
6. Add code to Frontend(template)
Let's add some code to the FrontEnd section. First, add the following code inside the head of base.html.
Note that jQuery is required for this implementation. Let's add jQuery as shown below.
base.html
<!doctype html>
<html lang="en">
<head>
    ...
    <script src="https://code.jquery.com/jquery-3.6.0.min.js" integrity="sha256-/xUj+3OJU5yExlq6GSYGSHk7tPXikynS7ogEvDej/m4=" crossorigin="anonymous"></script>
    <script src='https://www.google.com/recaptcha/api.js?render={SITE_KEY}'></script>
    <title>Document</title>
</head>
<body>
{% block content %}
{% endblock %}
</body>
</html>
Next, add the accompanying code under </html>.
This time, we prepared templates for function-based View and class-based View, respectively, so it is necessary to write js code with almost the same contents corresponding to these. Please understand that two almost identical codes are lined up for code verification purposes in the code below.
There is an item named SITE_KEY in the code. Please enter the SITE_KEY you got from reCAPTCHA.Also, there are several ways to specify the action in the JS code, but we will make it work by setting the id of the form to target. That's all for base.py.
Code to be written under base.html when using function base view.
base.html
<script>
    grecaptcha.ready(function() {
      $('#contactForm_func').submit(function(e){
        var form = this;
        e.preventDefault()
        grecaptcha.execute('{SITE_KEY}', {action: 'contactForm_func'}).then(function(token) {
          $('#recaptcha_v3_func').val(token)
            document.getElementById('recaptcha_v3_func').value = token;
            form.submit()
        });
      })
    });
  </script>
Code to be written under base.html when using function base view.
base.html
  <script>
    grecaptcha.ready(function() {
      $('#contactForm_class').submit(function(e){
        var form = this;
        e.preventDefault()
        grecaptcha.execute('{SITE_KEY}', {action: 'contactForm_class'}).then(function(token) {
          $('#recaptcha_v3_class').val(token)
            document.getElementById('recaptcha_v3_class').value = token;
            form.submit()
        });
      })
    });
  </script>
Let's create a template for the Form section. We will start by writing a function-based view and then a class-based view template.
The message created at the bottom of the template is intended to display an error message using the django message framework when a validation error occurs.
These two template files have the same contents; only the form ID is different.
formapp/func_view.html
{% extends "base.html" %}
{% block content %}
    <h1>reCAPTCHA Test</h1>
    <form id="contactForm_func" method="post" action="{% url 'formapp:post_list' %}">
        {% csrf_token %}
        {{ form.as_p }}
        <input type="hidden" id="recaptcha_v3_func" name="recaptcha_v3_func">
        <button type="submit" value="func">Create new</button>
    </form>
    {% if messages %}
    <ul class="messages">
        {% for message in messages %}
            <li{% if message.tags %} class="{{ message.tags }}"{% endif %}>{{ message }}</li>
        {% endfor %}
    </ul>
{% endif %}
{% endblock %}
formapp/class_view.html
{% extends "base.html" %}
{% block content %}
    <h1>reCAPTCHA Test</h1>
    <form id="contactForm_class" method="post" action="{% url 'formapp:post_list2' %}">
        {% csrf_token %}
        {{ form.as_p }}
        <input type="hidden" id="recaptcha_v3_class" name="recaptcha_v3_class" />
        <button type="submit" value="class">Create new</button>
    </form>
    {% if messages %}
    <ul class="messages">
        {% for message in messages %}
            <li{% if message.tags %} class="{{ message.tags }}"{% endif %}>{{ message }}</li>
        {% endfor %}
    </ul>
{% endif %}
{% endblock %}
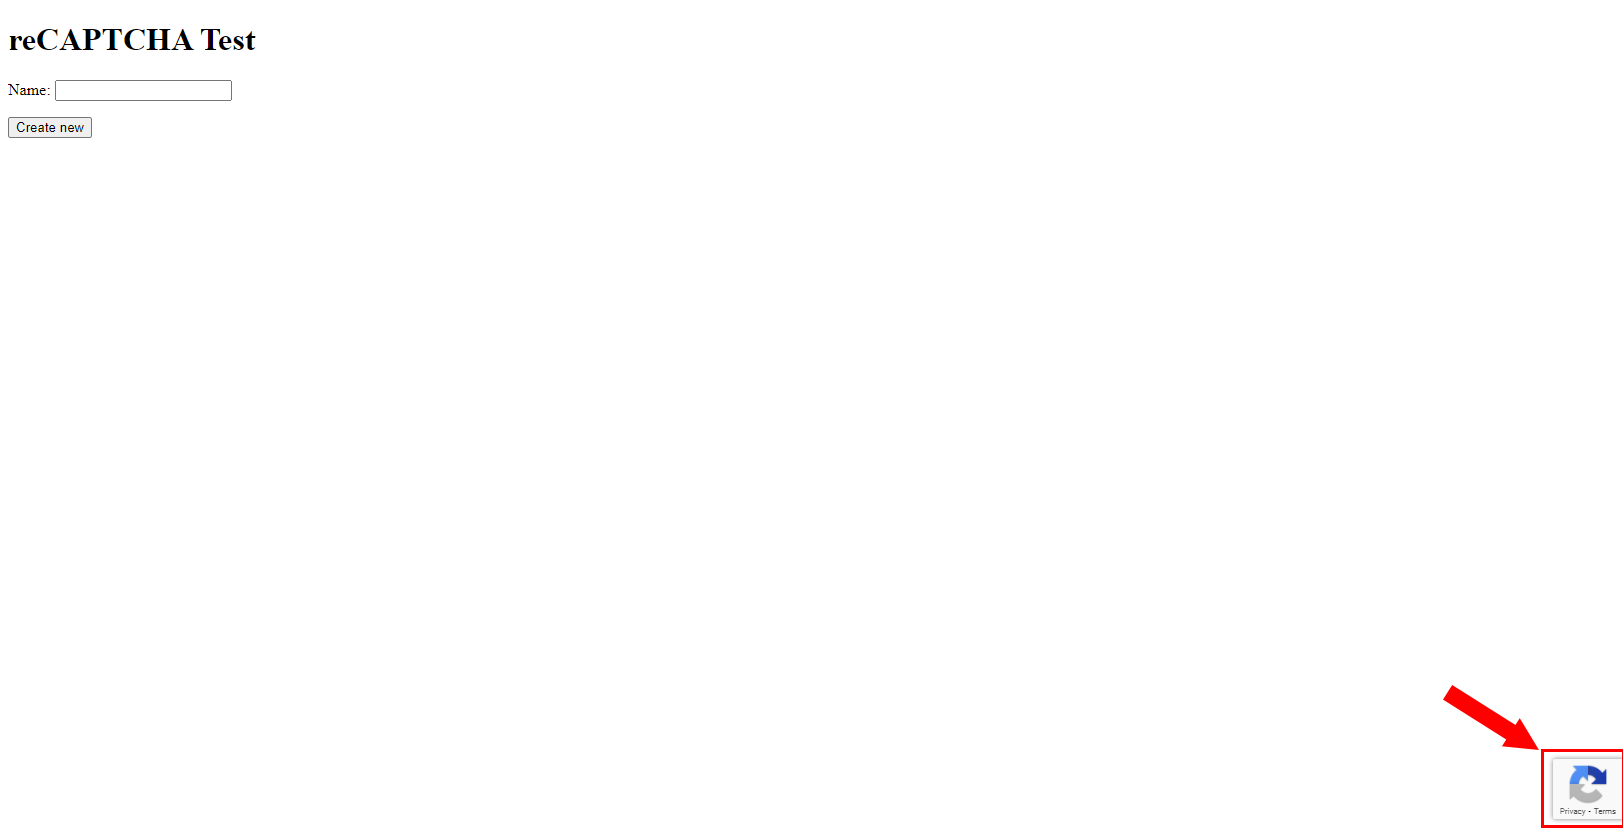
If you check your website(In general, this case is http://127.0.0.1:8000/contact1/ or http://127.0.0.1:8000/contact2/), you will see that reCAPTCHA is displayed.
7. Add token verification code to views.py
After implementing the frontend part, you will see the reCAPTCHA V3 mark, indicating a successful implementation. However, it is necessary to send the response received on the client-side to reCAPTCHA and verify the data for it to work correctly.
Without this validation, the reCAPTCHA will not function properly. Additionally, the reCAPTCHA administration page will display a message saying "Not verified".
To send data to reCAPTCHA for verification, we need to use Django's standard HTTP library, called "requests".
pip install requests
After installing “requests”, Let's look at the function-based View and the class-based View.
function-based View views.py
from django.shortcuts import render
from django.http import HttpResponse
from django.views.generic import FormView

from .forms import CreateForm
from django_06 import settings
from django.contrib import messages
import requests


def home(request):
    if request.method == "POST":
        form = CreateForm(request.POST)
        if form.is_valid():

            ''' Start validation '''
            recaptcha_response = request.POST.get('recaptcha_v3_func')
            data = {
                'secret': settings.RECAPTCHA_PRIVATE_KEY,
                'response': recaptcha_response
            }
            r = requests.post('https://www.google.com/recaptcha/api/siteverify', data=data)
            result = r.json()

            print(result)

            if result['success']:
                return HttpResponse('Success!')
                ''' if reCAPTCHA returns False '''
            else:
                messages.error(request, 'Invalid reCAPTCHA. Please try again.')

    form = CreateForm()
    return render(request, "formapp/func_view.html", {'form':form, 'recaptcha_site_key':settings.RECAPTCHA_PUBLIC_KEY})
class-based View views.py
from django.shortcuts import render
from django.http import HttpResponse
from .forms import CreateForm
from django_06 import settings
from django.contrib import messages
import requests

class ContactFormView(FormView):
    template_name = 'formapp/class_view.html'
    form_class = CreateForm
    success_url = '/contact2/'
    extra_context = {
        'recaptcha_site_key': settings.RECAPTCHA_PUBLIC_KEY
    }

    def form_valid(self, form):
        ''' Start validation '''
        recaptcha_response = self.request.POST.get('recaptcha_v3_class')
        data = {
            'secret': settings.RECAPTCHA_PRIVATE_KEY,
            'response': recaptcha_response
        }
        r = requests.post('https://www.google.com/recaptcha/api/siteverify', data=data)
        result = r.json()

        print(result)

        if result['success']:
            return HttpResponse('Success!')

        else:
            messages.error(self.request, 'Invalid reCAPTCHA. Please try again.')

        form = CreateForm()
        return super().form_valid(form)
In both cases, after receiving the response from the client-side, the view sends a post request to the endpoint that shown in accompanying code along with PRIVATE_KEY.
https://www.google.com/recaptcha/api/siteverify
To determine whether the POST request is successful, we can print the response.
If successful, reCAPTCHA will return data in the following JSON format.
{'success': True, 'challenge_ts': '2022-02-14T09:48:29Z', 'hostname': '127.0.0.1', 'score': 0.9, 'action': 'contactForm'}
In the event of an error, reCAPTCHA will provide the following data. Note that the error message is not the only type of error, and the message will vary depending on the type of error.
{'success': False, 'error-codes': ['invalid-input-response']}
Check here for more details on reCAPTCHA validation with this json format.
When the verification fails, the above code uses Django's message framework to display error messages to front end.
That's all! As you can see, implementing reCAPTCHA V3 is straightforward.
For websites with forms, implementing reCAPTCHA is an easy way to improve reliability. I highly recommend implementing it on such websites.
Finally, you can find the code for this article on this GitHub repository. Please feel free to use it.
That's it for this article. Happy coding!

